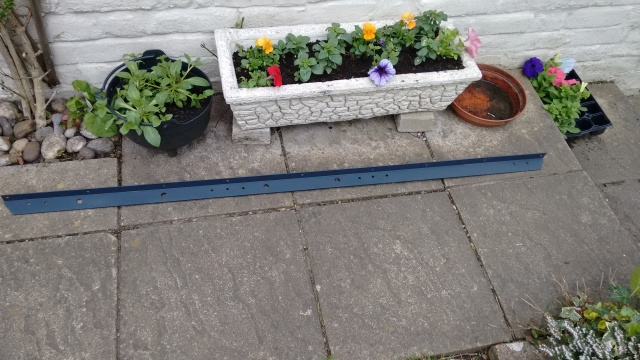
I have fitted the end panels, the length of angle that holds it to the rear tub, and a shiny new under-seat battery box in aluminium. These were all purchased from YRM Metal Solutions and I am really very pleased with the quality of everything, and the accuracy of the panels.
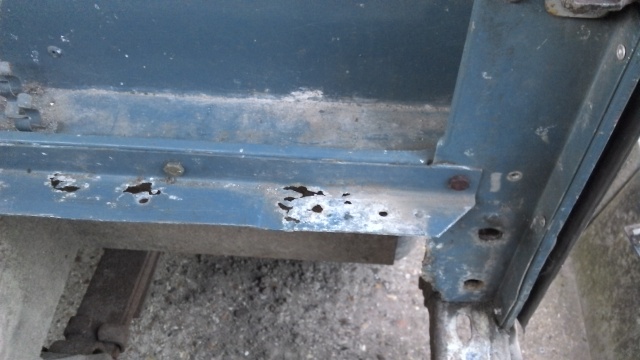
The most difficult part really was marking and drilling the holes in the angle. These are critical to get everything lined up properly. The new item is very slightly different from the old (much stronger) having a sharper angle, extruded rather than formed, and the old item was so badly corroded it wasn’t possible to use it as a template for all of the holes so some careful measuring was called for.
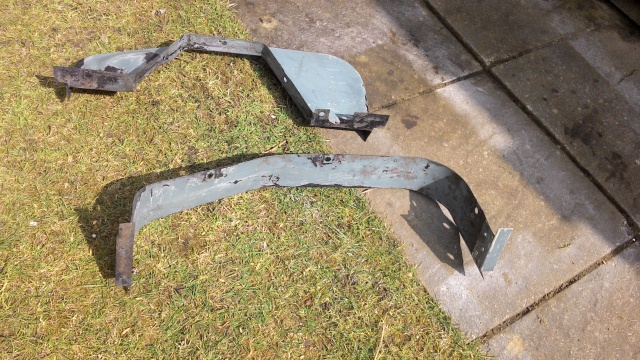
End panels
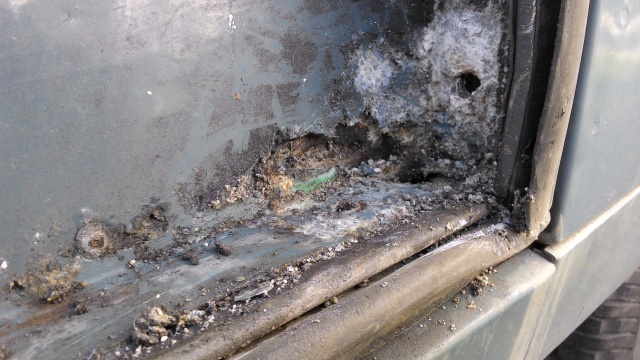
The aluminium end panels were badly corroded. It doesn’t look nice, isn’t weatherproof, and as it’s adjacent to the seatbelt mount I wonder if it could be considered an MOT item? This side was much worse, partly due I think to a collection of very old coins that had become jammed between the seatbelt mounting gusset and the aluminium causing a galvanic action. The hardest part was removing the bolts holding this bracket in place, I had to resort to grinding them off.
Removing the end panels after that is easy, just a case of drilling out the spot welds, leaving this:
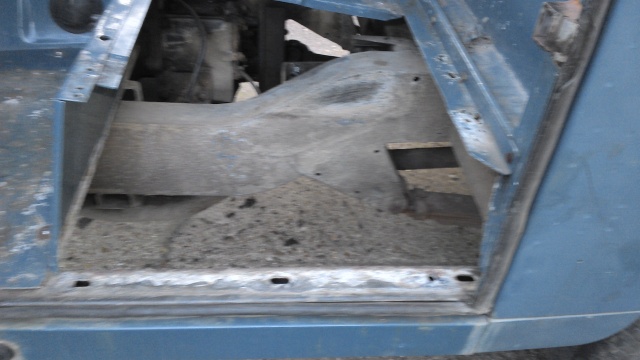
The trouble with that is that the factory spot welds aren’t particularly well-spaced or even in a straight line. So, replacing them with rivets, being that much more visible, would look rather untidy. Being slightly OCD I wouldn’t be able to live with that so I toyed with the idea of drilling new holes and filling the old.
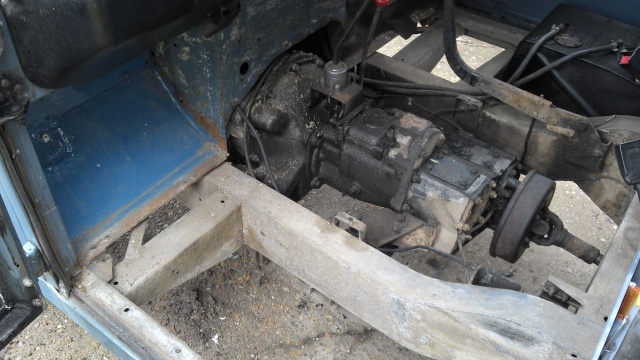
At this point, I thought it would be easier to work in the back garden so out came the seat box, floor and gearbox tunnel, and another small job became a major undertaking.
I had removed the rotten noise / thermal insulation material from the bulkhead, leaving a film of sticky adhesive and surface rust to scrape and sand.
Now with all the components off and in the back garden I can get on with things as and when time allows.
Reassembly up next!

Nice to see how things are coming… this is what I’m afraid in mine… as soon as I start tinkering with it it will be a full disassembly / restoration 😦
LikeLike
Yes, and I was so determined that it wouldn’t happen this time, it has though. I guess they’re all the same once you start taking them to bits. I should have learned by now.
LikeLike