I fitted this in July but just realised I didn’t write it up then. As part of my experiment in running the vehicle without turbo it was necessary to fit an exhaust manifold using the ‘Glencoyne’ method.
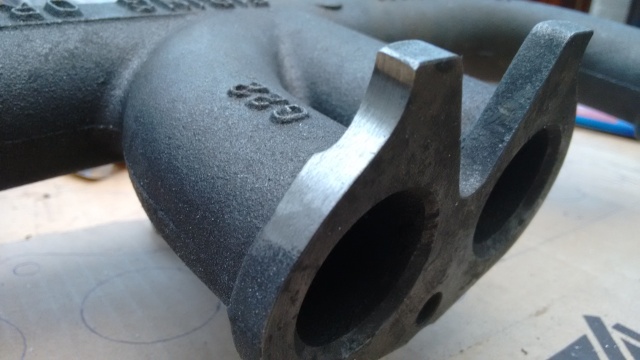
The aim was to fit the only manifold I could get hold of (part number ERC9688) which is normally fitted to the 2.5 naturally aspirated engine. Not being designed for the 200tdi engine, the mounting holes are nowhere close to the studs, although the ports align correctly. With Richard’s brilliant web site of knowledge to draw upon I asked my friend Trevor if he’d got any suitable offcuts from which to make brackets and he kindly brought round various bits of angle in steel and thick aluminium from his factory’s ‘leftovers’ stock.
Shaping the manifold
It was necessary to shape the manifold to sit snugly on the head. As Richard describes, the way it sits within the inlet manifold, it is locked in place horizontally and vertically, the clamps only have to hold the assembly tight against the head. Great care was taken marking these adjustments, a little filing then checking the fit:
I had planned on using mild steel for the brackets but there was nothing chunky enough, so I selected a thick piece of aluminium that had a formed, round angle to one edge. Armed with roll-ups, hacksaw and the Black and Decker I spent a good while making up the brackets in the shed. I then filed away into the night, hoping that my neighbours wouldn’t realise it was me making the highly irritating noise. By the end of it I had built up the muscles in just the one arm and had a set of clamps.
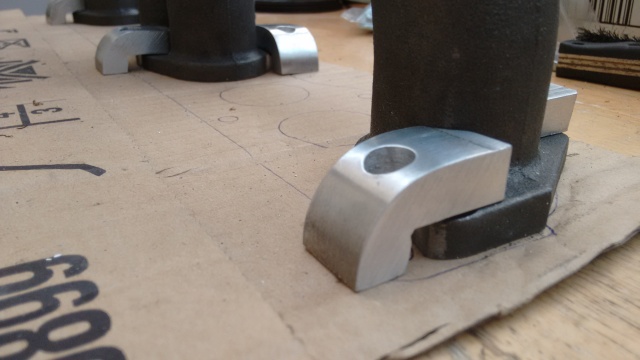
As the mounting holes fell on the curve (for just some of them) I then took off material (after the above photo was taken) so that the flanged nuts would sit flat on the clamps. I had to remove corners on some to ensure a snug fit and labelled each clamp as they are all very slightly different depending on their location:
More checking. I haven’t been caught out by my photo that includes some thin cutting discs! I found my hand wasn’t steady enough to use the angle grinder accurately and I did indeed do it all with a hacksaw!
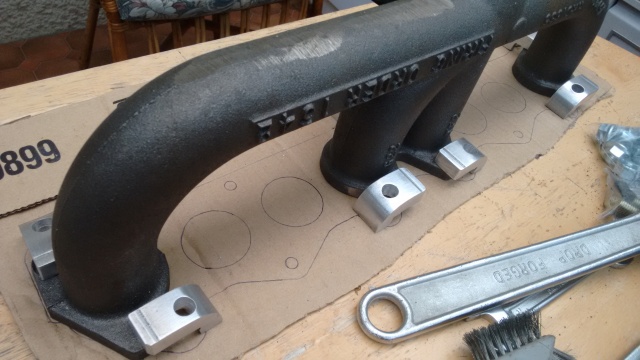
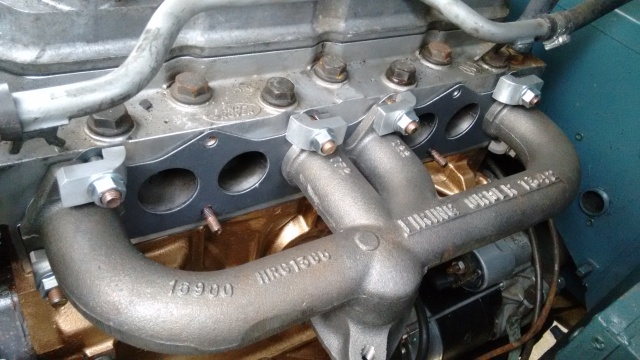
Next evening I fitted the manifold and although I won’t know if it will be successful for some time I think these brackets will prove sturdy enough to do the job:
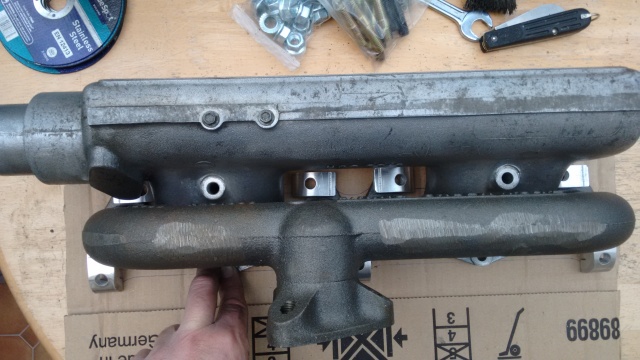
With the benefit of hindsight I wish I’d painted the manifold although I’ve never had much long-term success with paint durability on such a hot item. The ‘deluxe’ bonnet with its dish leaks slightly and already there are signs of rust. As spare time is limited I just want to get on so probably won’t dissemble it for now.
Thanks for reading.

Nice work. The clamps look like works of art. As for VHT paint, I did Annie’s manifold in silver 5 years ago. Most of it is still in place but there are rust patches all over it. It looked good for about a year.
LikeLike
Thanks Ian. It does seem a shame not to try preserving it, especially as it’s a rare clean and (almost) shiny part in the engine bay. I’m just frustrated at not getting very far this year, it’s SO close to being MOT-able again.
LikeLike